How to Build Your First Gaming PC: The Ultimate Step-by-Step Guide for Complete Beginners

Ever dreamed of playing your favorite games on a machine you built with your own hands? You’re in the right place. This guide will walk you through every single step of building your first gaming PC-even if you’ve never touched a screwdriver in your life. No tech jargon. No confusing instructions. Just real talk, real tips, and a little bit of fun. Ready? Let’s do this.
Why Build a Gaming PC? (And What You’ll Get Out of This Guide)
Let’s get real for a second. Why bother building a gaming PC when you could just buy one? Here’s the deal:
- You save money. Seriously, prebuilt PCs often cost more for the same parts.
- You get exactly what you want. No more paying for stuff you’ll never use.
- You learn how your computer works. If something breaks, you’ll know how to fix it.
- It’s fun. Like, really fun. (And a little nerve-wracking, but that’s part of the adventure.)
This guide is for you if:
- You’re a total beginner.
- You want step-by-step help.
- You want to avoid expensive mistakes.
- You want to see real pictures and clear examples.
All Parts Needed to Build a Gaming PC
Before you start, you’ll need all the right parts. Think of these as the “ingredients” for your gaming recipe.
| Part | What It Does (Simple) | Tips for Beginners |
|---|---|---|
| CPU (Processor) | The brain. Runs your games and programs. | Don’t touch the pins! |
| GPU (Graphics Card) | The muscles. Makes games look awesome. | Most expensive part-choose wisely. |
| Motherboard | The backbone. Connects everything together. | Must match CPU and RAM type. |
| RAM (Memory) | Short-term memory. Makes things run smoother. | 16GB is minimum, 32GB is great. |
| Storage (SSD/HDD) | Stores your games and files. | SSDs are much faster than HDDs. |
| Power Supply (PSU) | Gives power to all parts. | Don’t cheap out-get a good brand. |
| Case | Holds everything. | Pick a size that fits your desk. |
| CPU Cooler | Keeps the brain cool. | Stock coolers are fine to start. |
| Case Fans | Keeps air moving, stops overheating. | More fans = cooler PC. |
| Operating System | Lets you use your PC (like Windows). | Windows 11 is popular for gaming. |
| Monitor | Shows your games. | 1080p is fine, 144Hz is better. |
| Keyboard & Mouse | Lets you play and type. | Get what feels good for you. |
| Speakers/Headset | For sound. | Optional, but makes games better. |
Pro Tip: Always check that your parts are compatible. Use a site like PC Part Picker to double-check!

How to Build a Gaming PC Step by Step
Building a PC is like building LEGO-just bigger, and with more wires. Here’s the breakdown.
1. Prepare Your Workspace
- Find a clean, well-lit table.
- Avoid carpet (static electricity is the enemy).
- Grab a Phillips head screwdriver.
- If you have an anti-static wrist strap, wear it. If not, touch a metal object now and then.
Quick Tip: Keep all your screws in a small bowl. They love to roll away.
2. Unbox and Check Your Parts
Open each box, check that nothing is broken, and keep all manuals nearby. Trust me, you’ll need them.
3. Install the CPU on the Motherboard
- Find the CPU socket on your motherboard.
- Lift the small lever.
- Line up the golden triangle on the CPU with the one on the socket.
- Gently place the CPU in-don’t force it!
- Lower the lever to lock it in.
Mistake to Avoid: Never touch the bottom of the CPU. Those pins are super delicate.

4. Add the CPU Cooler
- If your cooler needs thermal paste, put a small pea-sized dot in the center of the CPU.
- Place the cooler on top and secure it using the included brackets or screws.
- Plug the cooler’s fan cable into the CPU_FAN header on the motherboard.
Info Box: Some coolers have thermal paste pre-applied-check before adding more!
5. Install RAM (Memory)
- Find the RAM slots on your motherboard.
- Open the clips at the ends.
- Line up the notch on the RAM stick with the slot.
- Press down firmly until it clicks.
Tip: If you have two sticks, use the slots recommended in your motherboard manual for best performance.
6. Install Storage (SSD/HDD)
- For M.2 SSD: Find the M.2 slot, insert the drive at an angle, and screw it down.
- For 2.5” SSD or HDD: Mount it in the drive bay and connect the SATA cable to the motherboard and power cable from the PSU.
Pro Tip: SSDs make your PC start up way faster than old-school hard drives.

7. Prepare the Case
- Remove both side panels.
- Lay the case on its side.
- Install the I/O shield (the metal rectangle that comes with your motherboard) into the back of the case.
Mistake to Avoid: Don’t skip the I/O shield! It’s a pain to add later.
8. Mount the Motherboard
- Place the motherboard into the case, lining up the holes with the standoffs (small raised screws).
- Secure with screws (don’t overtighten).
9. Install the Power Supply (PSU)
- Slide the PSU into its spot (usually at the bottom or top rear).
- Secure it with screws.
- Make sure the fan faces the right way (down if there’s a vent, up if not).
Tip: Modular PSUs let you use only the cables you need-less mess!
10. Connect Power Cables
- 24-pin cable from PSU to motherboard.
- 8-pin (or 4+4) cable from PSU to CPU power on motherboard.
- SATA power cables to SSD/HDD.
- PCIe power cables to graphics card (later).
11. Install the Graphics Card (GPU)
- Remove the metal slot covers on the back of the case.
- Line up the GPU with the PCIe slot on the motherboard.
- Press down until it clicks.
- Secure with screws.
- Plug in PCIe power cables from PSU.
12. Add Case Fans
- Mount fans at the front (for air in) and back/top (for air out).
- Plug fan cables into the motherboard or a fan controller.
13. Connect Front Panel Buttons and USB
- Plug in the power button, reset button, USB ports, and audio jacks to the motherboard.
- Use the motherboard manual for help-these tiny connectors can be tricky!

14. Cable Management
- Tuck extra cables behind the motherboard tray.
- Use zip ties or Velcro straps to keep things neat.
- Make sure nothing blocks the fans.
15. Final Double-Check
- Are all cables plugged in?
- Is the CPU cooler secure?
- Are all RAM sticks and storage drives installed?
- Is the GPU locked in?
16. First Power On
- Plug in your monitor, keyboard, and mouse.
- Connect the power cable and flip the switch on the PSU.
- Press the power button. Fingers crossed!
If Nothing Happens: Double-check all cables, especially power connections.
17. Enter BIOS/UEFI
- When the PC starts, press the key shown on screen (often Delete or F2) to enter BIOS.
- Check that your CPU, RAM, storage, and GPU are detected.
18. Install Operating System
- Insert your Windows USB stick (or other OS).
- Follow the on-screen instructions.
- Install drivers (from motherboard and GPU websites).
19. Install Your Favorite Games
- Download Steam, Epic, or whatever you use.
- Install your games.
- Get ready to play!
How to Build a PC Step by Step with Pictures
Wish you could see what each step looks like? Here’s a quick visual guide. (If you want a printable version, scroll down for the PDF tip!)
| Step | Picture Description |
|---|---|
| CPU Install | CPU lined up with socket, lever up |
| CPU Cooler | Cooler placed on top, thermal paste dot |
| RAM | RAM stick lined up, notches matching |
| Storage | M.2 SSD angled into slot |
| Motherboard in Case | Board lined up with standoffs |
| GPU | GPU pressed into PCIe slot |
| Power Supply | PSU secured at bottom of case |
| Cable Management | Cables tied behind motherboard tray |
| First Power On | Monitor, keyboard, mouse plugged in |
Want a PDF? Search “how to build a pc step by step with pictures pdf” and you’ll find printable guides and checklists for your build.
How to Build a Gaming PC for Beginners
If you’re new, don’t worry. Here’s what I wish someone told me before my first build:
- Take your time. Rushing leads to mistakes.
- Watch a YouTube video (like Ben Rowlands’ step-by-step guide) to see the process in action5.
- Don’t force anything. If a part doesn’t fit, double-check the orientation.
- Keep your manuals handy. They’re your best friend.
- Celebrate small wins. Every step is progress!

How to Build a Computer from Scratch
Building from scratch means picking every part yourself. Here’s how:
- Set a budget. Decide how much you want to spend.
- Pick your parts. Use compatibility tools online.
- Order everything. Double-check your list.
- Follow the assembly steps above.
- Install your OS and drivers.
- Enjoy your custom PC!

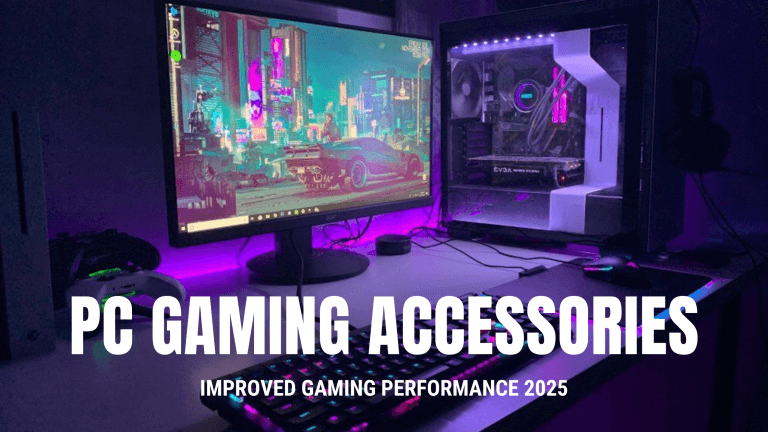
Full Gaming PC Setup with Monitor
A PC isn’t complete without the right setup. Here’s what you’ll need for the full experience:
| Item | What to Look For |
|---|---|
| Monitor | 1080p for budget, 1440p or 4K for high-end. 144Hz refresh rate is great for smooth gameplay. |
| Keyboard | Mechanical for gaming feel, membrane for quiet typing. |
| Mouse | Look for adjustable DPI and comfortable shape. |
| Headset | Good sound and a mic for chatting with friends. |
| Mouse Pad | Bigger is better for gaming. |
| Speakers | Optional, but nice for music/movies. |
| Desk & Chair | Comfortable for long sessions. |
Tip: Don’t forget a surge protector to keep your new PC safe!

Troubleshooting: What If My PC Doesn’t Turn On?
Don’t panic. Here’s a quick checklist:
- Is the power supply switch on?
- Are all cables plugged in tightly?
- Did you connect the power button cable?
- Is the RAM seated properly?
- Try removing and reinstalling the GPU and RAM.
Still stuck? Search for your motherboard’s error lights or beeps-they’ll tell you what’s wrong.
Extra Tips for Beginners
- Always ground yourself to avoid static shocks.
- Don’t work on carpet.
- Take breaks if you get frustrated.
- Ask for help if you need it-online forums are full of friendly builders.
- Keep your boxes and receipts in case you need to return anything.
Info Box: How Much Does It Cost to Build a Gaming PC?
- Budget build: $500–$800 (good for esports and older games)
- Mid-range: $800–$1,500 (plays most new games well)
- High-end: $1,500 and up (for ultra settings and future-proofing)
You can always upgrade later!
Sample Build List (2025)
Here’s a solid beginner build for 2025:
| Part | Example Model | Price (Approx.) |
|---|---|---|
| CPU | Intel Core i5-13400F | $180 |
| GPU | Nvidia RTX 4060 | $300 |
| Motherboard | MSI B760M PRO-VDH | $120 |
| RAM | 16GB DDR4 | $50 |
| Storage | 1TB NVMe SSD | $60 |
| Power Supply | 650W 80+ Bronze | $50 |
| Case | NZXT H510 | $70 |
| CPU Cooler | Stock or Cooler Master 212 | $35 |
| Fans | 2x 120mm | $20 |
| Monitor | 24” 1080p 144Hz | $120 |
| Keyboard/Mouse | Combo Pack | $40 |
Total: Around $1,045
You can mix and match parts based on your budget and needs!
FAQs
Conclusion
Building your first gaming PC might seem scary, but you’ve got this. Remember, every expert started as a beginner. Take your time, follow each step, and don’t be afraid to ask for help. When you finally power on your PC and see that first boot screen, you’ll feel like a total boss.
